

To get started navigating with your mouse, simply position the cursor in the middle of the screen, click and hold the left-mouse button to pan the map in the desired direction.
The "magnifier bar" is located in the upper left hand corner. The following is a description of how to use the magnifier bar:
1. Use the arrows on top of the magnifier bar to shift the users view around the map. Click an arrow to pan in that direction (N,S,E,W)
2. Magnify the map detail by clicking on the "+" to zoom in
3. The user can use the slider bar be selecting it and moving it up or down to zoom in or out
4. The user can zoom out by clicking on the "-"
Note: An area of interest can be also magnified by double-clicking on an an point of interest.
The start and end points of lane closures are indicated by orange-colored cones and a mapped line segment. Only lane closures that have scheduled activity within the filtered date range will be displayed. To learn additional information about a particular lane closures, click on any part of the line segment once and an informational window concerning the selected lane closure will float over the map. Only one lane closure informational window will be displayed at a time, although if multiple lane closures exist on the same road segment, they will be displayed within this informational window.

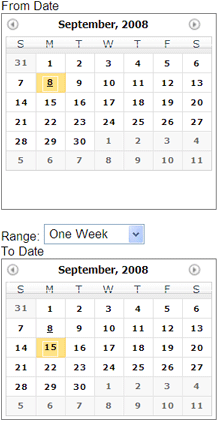
 A calendar filter is provided to filter events within desired start/end dates and is located on the right side of the map. Dates of interest may be changed by double-clicking either the "From Date" (i.e. start date) or the "To Date" (i.e. ending date).
To establish a consistent range with different start dates, the "Range" drop-down menu provides several options (e.g. one day, one week, two weeks, etc.) between these calendars and corresponding lane closures displayed on the map. All lane closures scheduled during the selected time frame are displayed. Dates chosen with the calendar on this screen are carried over to the <Closures>; list view tab.
![]()